Potatoes and Black Plastic

For all of last year (and a fair bit of the year before as well) I have been fighting an uphill battle against the weeds on my plot, specifically the grass.

I have regularly spent upwards of five hours strimming, raking and clearing the grass only for it to spring back to three feet deep almost overnight.

Last year my time on the plot was mostly limited to Saturdays as I look after my 2 year old grandson Jack on Sundays, so time spent cutting the grass was time I really couldn't afford to lose. I am determined to make be more organised this year, so I have invested in another roll of thick weed fabric and used it to cover the areas on my plot that I haven't managed to get around to as yet. I am hoping that this will effectively smother the majority of the weeds and grass, giving me more hours to spend on the rest.

Purple Sprouting
January King Cabbages under netting
I have covered just under a quarter of my plot with the weed fabric
which will give me some much needed breathing space to get the beds weeded, composted and ready for planting. Despite the new season being upon us, there are still a few crops still in the ground from last year.

I still have four or five purple sprouting broccoli, and about the same
January King cabbages. The leeks from last year are also still looking ok, but I won't know until I pull them if the stems are still firm all the way through.

Last few Parsnips
There are also a few parsnips still waiting to be lifted, but as they store much better in the ground I will be
leaving them there until they are needed for a specific meal.

Leeks nearly ready for harvest
This growing season has well and truly started with garlic and Snowball onion sets being planted into one bed. I don't plant my onions out to over winter as the first time I tried that I lost over 80% of them, so instead I use a modular seed tray and put each bulb into its own section along with some compost and water them in well. Once their leaves have reached 4-6 inches I them transplant them into their final positions in the beds.

I recently went to a Potato Day at the Hulme Community Garden Centre where they had upwards of 40 different varieties of seed potato for sale.


First and Second Earlies
This year I decided to play it safe and went for varieties that I have had before and gotten good results from, plus a couple of new ones. I have gone for six varieties again this year. I chose two First Earlies (Pentland Javelin and Colleen), one Second Early (Bambino), one Early Maincrop (Mary's Rose) and two Maincrops (Sarpo Mira and Pink Fir Apple).

Maincrops
The newcomers amongst all these are Colleen and Mary's Rose. All the potatoes are chitting away in egg boxes in the polytunnel and should be ready for planting by the end of March. In the past I have planted both into the ground and also into buckets with varying success, and this year I have decided that the majority of my potatoes will be planted into buckets, bags and other containers.

This is because I have a limited number of beds for veg, and by taking up three or four of them with potatoes I am really limiting my available planting space for other crops. Also, I can place the buckets on the black weed fabric that I have just set out so I will effectively be utilising more of my plot, and I can space them more widely that I could within a bed as that caused a bit of a problem last time due to the foliage overlapping adjacent pots making it difficult for them to be watered as much as they needed.

The New Season Starts Here

I have spent quite a few hours over the winter trying to decide what to grow on the allotment this coming season.

Like many gardeners, over the last couple of years I have built up a quite impressive collection of different seeds from many places.

Some of these, like the Purple Topped Milan Turnips, will never get planted as neither I nor my wife like them.

Others like Asparagus Pea have been planted once but we didn't like the taste.

Yet more are in the sad situation of being either too far past their use-by date to be worth trying again.

The final lot of seeds destined never to be sown on my allotment are those that are OK, but are not my favoured variety - a good example being the Purple Climbing French Beans that I grew last year.  Perfectly good in their own right, but not as nice on the plate (in my opinion) as Cobra or Blue Lake.

I store my seeds in three large plastic boxes that used to hold mushrooms, and each box is split into three sections.

The seeds are split into the following sections - Brassicas, Herbs, Legumes, Leaf Crops, Cucurbits, Root Crops, Tomatoes and Chillis, Alliums and Others.

After discarding the out-of-date seeds and those that I won't be using for the reasons listed above, I still have over 150 varieties including 20 types of tomato, 11 chilli peppers, 9 lettuce, 6 courgettes and 5 types of cauliflowers including purple and romanescue.

Obviously I won't be able to grow all of these, but until the sowing time arrives I am holding back on choosing one variety over another.

Last summer I had been asked to help judge the local Housing Association Garden competition, and I received £50-worth of garden vouchers as a 'thank you', so I decided to make good use of them and purchase a few propagators and seed trays so that I was able to start my seed sowing tonight.

I chose 10 tomato varieties (last year I didn't get a single tomato, so I am determined to do better this year).  I wanted lots of variety so I planted a couple of cherry tomatoes, a couple of large beefsteak type, some plum (standard and baby) and then some unusual varieties like Green Zebra and Orange Banana.

Broad Beans were fairly easy as I only had two varieties, Crimson Flowering and Bunyard's Exhibition, so I sowed a dozen of each.

Last year I got a few packets from Seeds of Italy which I was very happy with, so I also sowed a few cells with Lettuce Bisca Rossa which had provided us with several nice salads over summer.

I am also trying some shallots from seed this year, the variety is Zebrune, and so I sowed 21 into individual cells.  I normally use sets, but wanted a bit of a challenge this year :)

I have put the mini propagators on the box room windowsill to germinate - hopefully I will start to see some life within the next week.


Big Momma is in the house (hive)

It's inspection time again at the allotment apiary.

The bees are supposed to be inspected at least every nine days to make sure that the colony isn't running out of space and likely to swarm, but due to poor weather this inspection has spilled over onto day 12.

Opening the hive
The fact that this is a new colony from a swarm coupled with it only covering three or four frames on the last inspection meant that we weren't too concerned, but as it was a lovely day yesterday we decided to inspect on the way home from work.

Diane very kindly agreed to help once again, so suited and booted the two ladies opened up the hive and got to work.


On opening the hive it was obvious that there was not major change from last time.

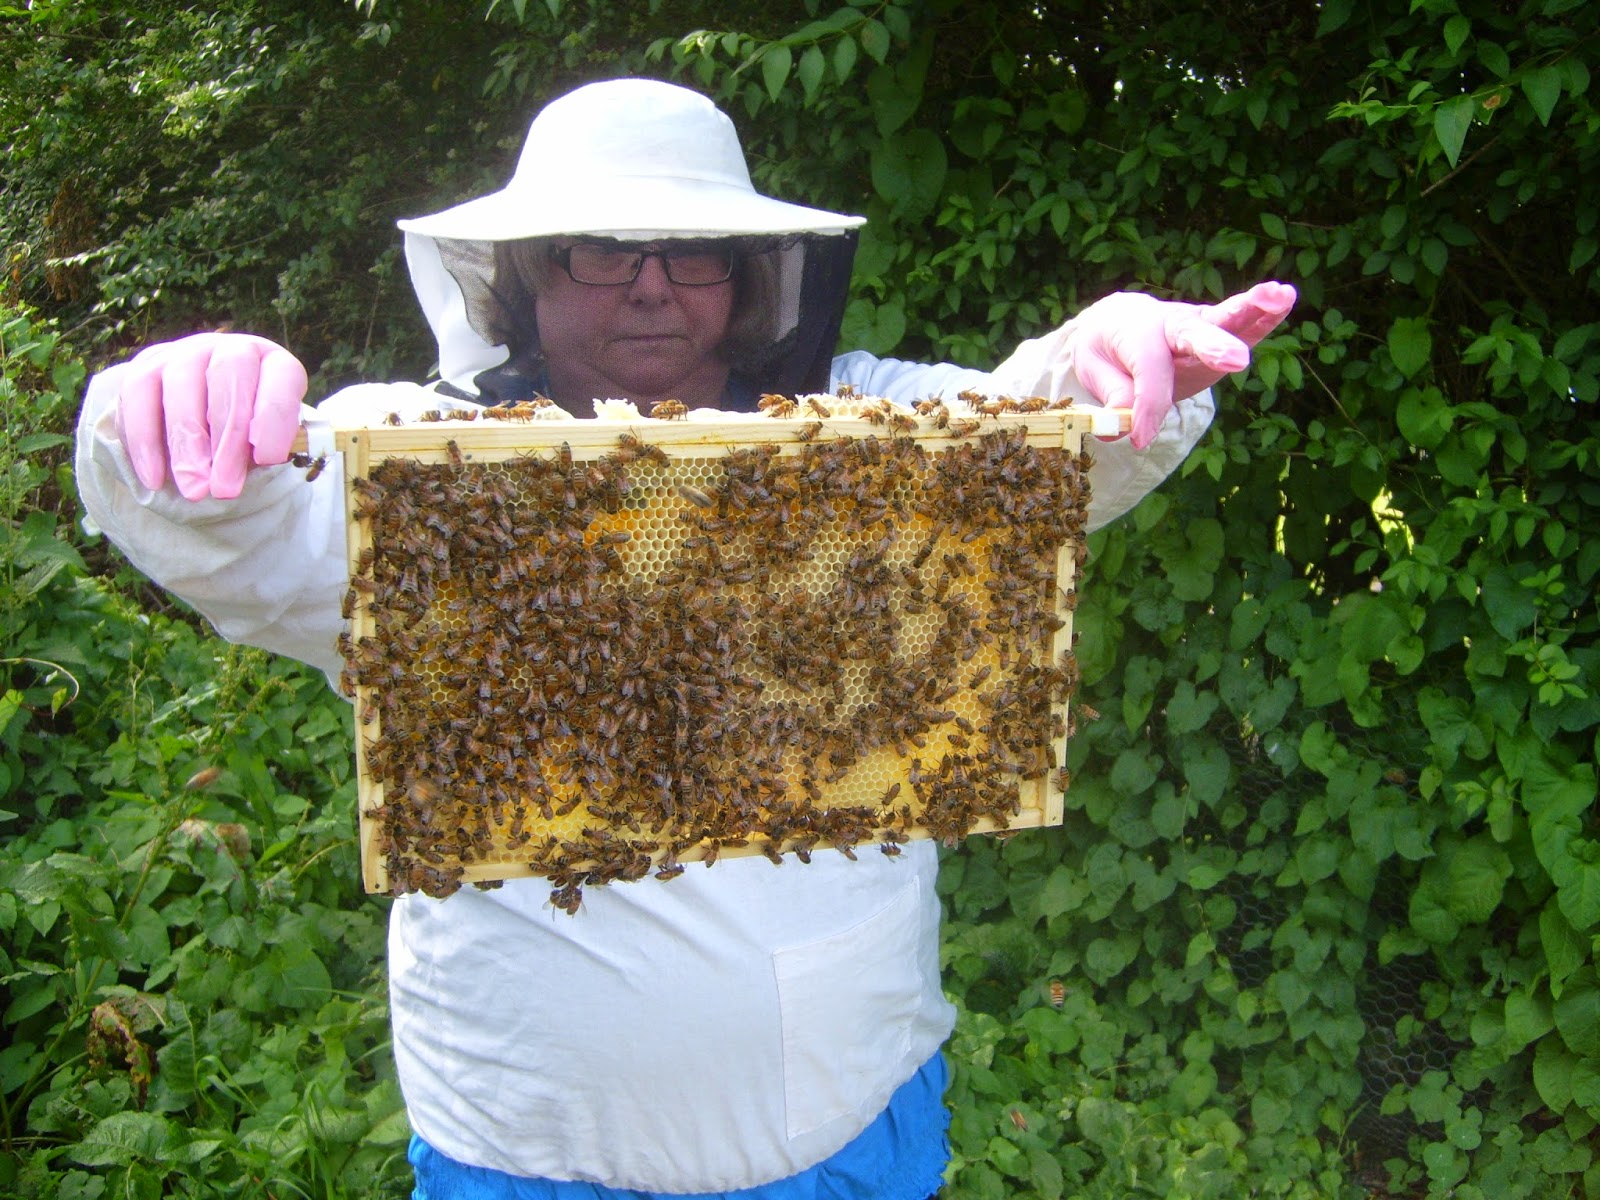
Frame five - lots of bees but no real comb as yet

 
The bees were clustered around frames six through nine as before, but when Angela lifted out frame five there were a lot of bees on it, but only the beginnings of comb.


This is a good sign as it means that they are getting ready to expand.


Frame six
 
I have been watching the bees over the past week every time I have been on the plot, and they have certainly been busy.


We have still got the entrance reducing block in place and sometimes the bees have been queuing up to get into the hive.

Some of the returning bees are obviously carrying loads of pollen as the baskets on their legs are full of bright yellow and white pollens, destined to be used to feed the growing brood.

One of the objectives for today was to try and locate the queen, and Angela spotted her on the outside of frame six.

Close up on the queen - middle of the picture, one third in from the right with no banding
A queen bee is supposed to be about 50% larger than the workers, but this lady was huge - almost double their size, and a lovely pale brown colour.

Frame seven showing lots of activity


She wasn't marked, which means that either she is a new, young queen (which fits with there being no evidence of her laying until day 17) or an old queen from a wild colony, or from a colony that hasn't been looked after properly.


Frame 8
The nearest other colony to home is apparently not being run and inspected properly according to our local Beekeeper's association, so it is possible that this is one of their older queens, but for now we have to assume that she is a new queen and so we will mark her up accordingly.


Marking queens is done for a couple of reasons - firstly, it lets you know how old the queen is as each year a different colour is used - this year is green - and secondly, it makes her much easier to spot when you are scouring the frames to find her.


Unfortunately Diane hadn't brought her queen marking gear out so we had to leave her unmarked for now, but at least we had seen her at last.

Frame nine with loads of mutant comb


The fact that she was on the outside of frame six is hopefully a good sign as the only reason for her to be there is to lay eggs, and she should only be there if the other frames are full.


If she has been laying strongly since she was mated then soon we should start seeing an increase in the colony size.


Workers take 21 days to hatch from being laid, and so assuming that the earliest she started laying was right after the second inspection on day 10 today was the very earliest that we could expect to have new bees.


Italian bees such as we have are supposed to be prolific layers, so hopefully we will see a huge increase in numbers at next weekend's inspection.


A queen can lay up to 2,500 eggs a day, so over seven days we may have a few thousand additional workers to help build the comb for the colony to expand and survive.


Frame ten being replaced
As the bees had not expanded the comb as much as we would have liked to see we decided to give them a final feed of sugar syrup, but only 1/2 a kilo in a litre of water this time.

After this they are on their own.

We have a Queen!

New Brood Box in place
It has been about a week since we did our first inspection of our new beehive.

It is important to check your bees at least every nine days during the summer months to make sure that your colony has enough room, and that they are developing well with no sign of disease or infections.

Last time Angela checked the hive it was very obvious that the spacing of the frames was all wrong as the bees had started to fill in the gaps between the frames with comb, leasing to the strange formations you can see in the pictures from then.


Revealing the colony
When I had got our hive last year it had come with a couple of strips of metal castellations, and so I had decided to fix these inside the brood box as I thought that was where they should go.

I now know that this was a mistake, as it made the spacings too wide.  A National brood box has space for eleven frames, but we only had ten in ours, hence the extra comb.


Moving the frames to the new brood box
Fortunately we already had a spare brood box without castellations, and we also had a handful of plastic spacers that fit over the ends of each frame to make sure that there is just the correct amount of gap.

We needed to transfer the colony from one box to another.

The first thing to do was to put a large piece of cardboard on the stand next to the hive, and to lift the whole brood box off the base and on to the cardboard.

The first of the drawn frames-frame 5


This was to make sure that the queen (if we had one) did not drop off the bottom of the frames and into the grass and get lost.


After that, each frame had to be lifted out of the original box, plastic spacers added to each end and placed into the new box.


Checking for brood


It was important to keep the frames in the same order so this was done very methodically.


Angela started to come across the first drawn comb five frames in, and was soon uncovering the bulk of the colony on the next frames.


Frame seven showing plenty of capped cells

Frames five, six and seven were where the main colony was, and Angela and Diane checked both sides of the frame for evidence that the queen was there, and was viable.


Fortunately there was a good brood pattern with plenty of capped brood which meant that our queen was still alive, and had mated.

Strange comb formation


As a viable queen she had started to lay and our colony looks to be on its way at last.


Frames seven,eight and nine were also quite heavy which indicated that not only did we have brood in the capped cells and pollen in the bright yellow cells, the bees were also storing nectar which would eventually become honey.

A very good sign.


Plenty of activity

It has only been seventeen days since I caught the swarm, and as it takes a minimum of 21 days for a bee to hatch we weren't expecting to see an increase in numbers just yet.


The numbers in the hive don't appear to be much reduced, thankfully, and now that we have seen that the queen is laying we can look forwards to seeing much more comb containing brood, pollen and nectar the next time we inspect.

Diane pointing out a cell filled with nectar


The strange comb formations will need to be dealt with at some point.


We will probably wait until all the brood have hatched before carefully slicing the surplus off and returning the trimmed frame to the hive.


The empty feeder
The bees had managed to eat all of the sugar syrup that we had put out for them on our first inspection which means that they are either very lazy, or that the flow of nectar and pollen coming into the hive is still not up to full speed.

We didn't have any more syrup with us this time so we decided not to feed the colony any more just yet and to wait until our next inspection to see how they have done on their own

Frame nine showing some development


Diane's bees drew out seven or eight frames on one feeding of sugar syrup, but ours have only managed five or six on two feeds.


I have been reading up everything I can find on the internet about Italian bees, and it seems that if you feed them they will prefer to raise brood with syrup rather than build comb.


Brushing the last few bees from the original brood box


This may explain the slow progress across the frames, but also means that we may have a sudden dramatic increase in population inside the hive fairly soon so it will be important to have a second box ready to put on top of the brood box to give the colony room to expand so they don't feel the need to swarm.


Fennel, Chicory and Manchester Carrots!

I had a quick visit to the plot tonight to finally get most of the seedlings into the ground.

These have been waiting in their pots for far too long, so I decided that I would have to squeeze them in wherever I could.
Fennel


I stuck my seven Fennel plants into my square foot bed planted one per square.

I have never grown this before, so I am looking forwards to seeing how it develops.

Italian Lettuce


Also in this bed are some Italian lettuce and also some Chicory.

I purchased a few seeds from Seeds of Italy this year, the plan is that most of the crops grown in Italy come from the Northern regions where the climate is similar to ours here in the North West of England.


Chicory


Chicory is another plant that I have never grown before, I believe it can be harvested through the summer for it's leaves to add to salads, but if the root is lifted and kept in the dark over winter it will form the chicory 'chicons' that we see in the supermarkets.

I'm really looking forwards to trying this out.


Little Gems

The Little Gem lettuce that I planted out about four weeks back have finally started to bulk up a bit.

Until very recently these plants had been shaded by some perpetual spinach and some chard that I had let go too far - the lettuces' progress seems to show that I made the right decision when I pulled up the giant plants to give these some more room.


Nantes Carrots

The Nantes Carrots have suddenly grown to a tremendous size, the fronds are now almost 2 feet high.

At one point I thought that I wouldn't be getting any as they took ages to germinate.

I also planted up loads of Manchester Carrots last night - hopefully these will not take as long to show.


Rocket with two rows of Celery in front
The Rocket I planted at the same time as the Celery has not responded well to the hot spell we are having - virtually every plant has bolted and produced a flower.

I have pinched out all the flowers and given them a good soaking - hopefully this will let me keep them a bit longer.

The Celery plugs in front of the Rocket are also doing well but are still growing slower than I had expected.


Nearly Ripe


Some of my strawberries are now ripening - I have had nearly 1.5kg so far over the past week, with probably ten times as many still to come as the various varieties I have ripen.


I think that I will be making strawberry jam this weekend.


\My first grapes

All of the fruit on the plot is at varying stages of ripeness.

Only one of my raspberry canes has ripened whilst the others are still at the tiny green berry stage.

The grape vine that I was given last year has loads of tiny bunches showing, and the gooseberries have lots of fat berries which are starting to change from green to red.

Black currant berries


Even the tiny black currant bushes have loads of fruit.


White Currant

Red Currant
The white and red currants that I was given last year have masses of fruit on them which is nearly ripe.

This is the first time that I have grown these, and as it was so easy to propagate from cut stems last year I think that I will probably have a few more this time next year.
Onions and shallots


The onions and shallots are swelling nicely, but some of the yellow onions have started to flop over which normally means that they are ready to lift.

These will be very small bulbs, but hopefully the rest will be able to grow a bit more before I have to lift them too.


Most of the shallots have split into four bulbs,but some have split into five or even six, and there are a couple of threes, but these are quite large bulbs.


I grew shallots from sets last year for the first time, but this year's offering looks to be a far better crop.

Shallots showing the split


This is probably due to the soil that they are planted in - last year they went into a bed that had been double dug, but was quite full of heavy clay.

This year they have been planted in a lasagne bed which had been used for my potato buckets last year, and so has had plenty of  compost dumped on top as the buckets were emptied.


Cara, Sarpo Mira and Pink Fir Apple Potatoes


Speaking of potatoes, this year's crop is doing well.

I have already had a few first earlies, both Red Duke of York and Maris Bard, which have been in the ground for just about 12 weeks.

My second earlies and maincrop are now outgrowing the first earlies and I am looking forwards to a good showing.


Now that I have started this season's harvest in earnest I have decided to keep a running total of how much it would have cost me to buy what I have grown from the supermarkets.

So far I have saved £16.50 - mostly on strawberries.